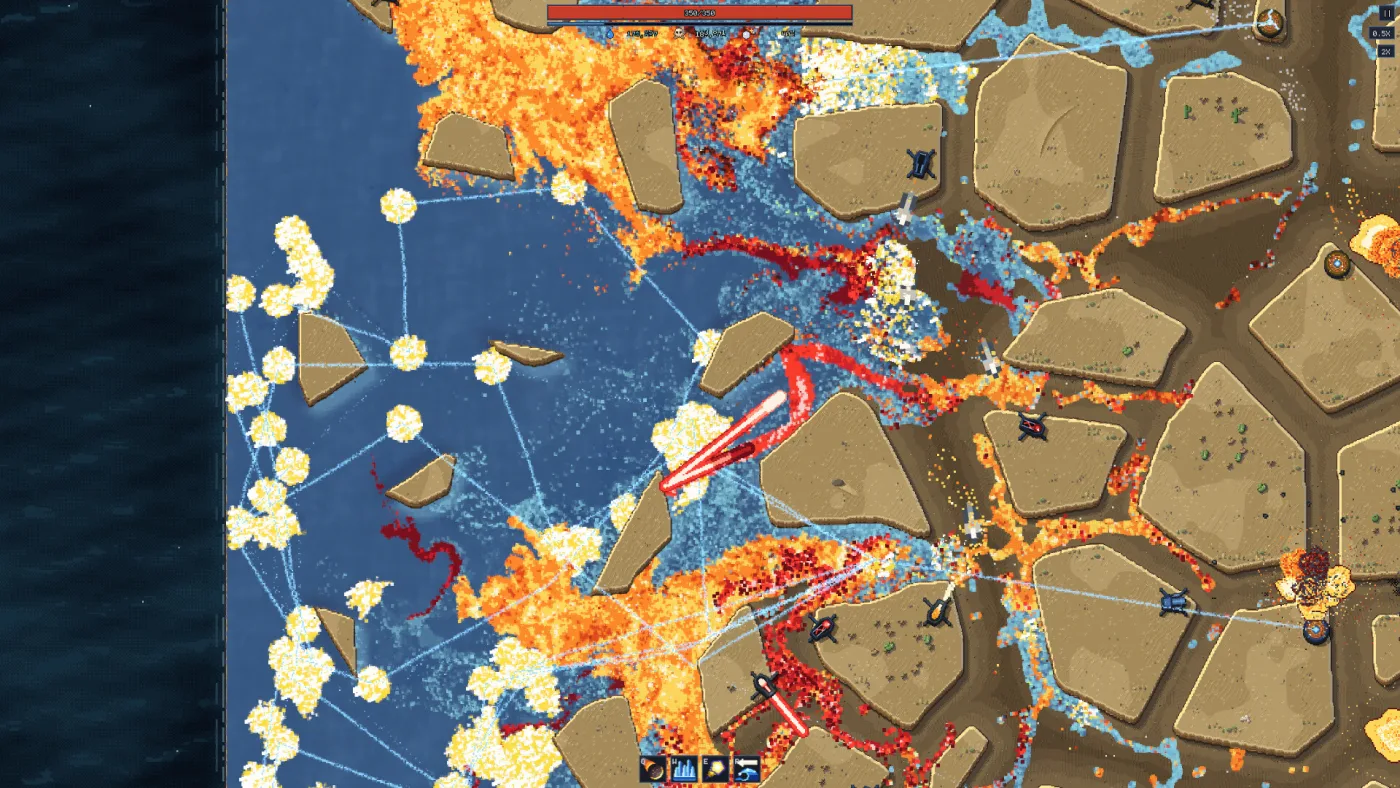
The flood is the enemy
The store page’s description is unusually literal: “the enemy is a real flood”. Hundreds of thousands of drops pour downhill toward your base. They do three things that ordinary tower-defense enemies do not:
- They pool. Water that cannot get through stacks up behind the blockage.
- They find gaps. A wall with a hole is a funnel, not a wall.
- They change the map. The bank they run against erodes, so the channel gets wider and the safe ground gets smaller.
That is why the game is not solved by raw damage. You are fighting a fluid that will go around, over and eventually through whatever you build.
Erosion: the clock you cannot see
The store page is explicit:
“Water eats into the riverbanks as it flows. Channels get wider, islands shrink, and a turret on a crumbling bank goes down with it.”
In practice:
- The outer bank is temporary ground. A turret placed on the edge may survive the first surge and fall in the second.
- Islands shrink. A small island that gives you a forward firing position will not stay that size.
- Erosion is a route-opener. As the channel widens, water that was forced through one choke can spread into a second path. Your old kill zone stops covering the flow.
There is no published erosion rate. The trailer shows banks slumping during a level; the exact speed depends on the map and the volume, and we have not measured it.
Three ways to fight water
| Approach | What it does | Turrets / tools | Risk |
|---|---|---|---|
| Kill | Removes drops before they reach the base | Flame, Laser, Tesla, Mortar, Auto | Damage alone loses to a wide flood |
| Block | Stops or slows the flow | Frost Wall, barricades, walls | Water pools and reroutes; the block is temporary |
| Redirect | Sends the flood where you want it | Walls, barricades, Fans, flood reversal | A bad redirect can open a path to the base |
The best players combine all three: a wall to shape the channel, a Fan to push the flow back into the kill zone, and Flame or Mortar to delete the clump.
Barricades and walls
Two things are confirmed by demo players:
- Z (QWERTY) or Y (QWERTZ) removes a barricade.
- The same key moves a wall. The discussion thread “Moving the walls” is answered with the same Z / Y advice.
What is not documented: whether moving a wall costs resources, whether barricades have health, and whether every map allows the same edits. The controls page keeps the confirmed keys in one table.
Reading the flow
A simple way to read any Water TD map:
- Find the lowest line. Water takes it. That is your first kill zone, whether or not it is convenient.
- Find the pinch points. Narrow channels concentrate drops; wide flats spread them. Put AoE at the pinch, single-target on the straight.
- Find the soft bank. If the bank beside your kill zone is eroding, plan a second position behind it now, not when the turret falls.
- Find the emergency reroute. A wall you can open or a Frost Wall you can place gives you a second path for the flood when the first kill zone floods over.
Lava, ice and other maps
- Lava level: players report it is easier than the base map and that cannon and fans do the work. Whether lava erodes terrain the same way is not documented.
- Snow / Level 10: the trailer shows a white, channel-cut map for Level 10. We do not know its mechanics beyond the visual.
- Island maps: the trailer and screenshots show maps built from separated islands; erosion shrinks the islands, so forward positions have a shelf life.
What we do not know
- The exact simulation model (drop count, pressure, flow speed).
- Erosion rates per map.
- Whether barricades have HP or are purely directional.
- Whether lava and water share rules.
- Whether the launch build changes any of the above.
We will update this page from patch notes and the launch build rather than guess. If you want the practical version, read the beginner guide; if you want the turret list, read turrets.